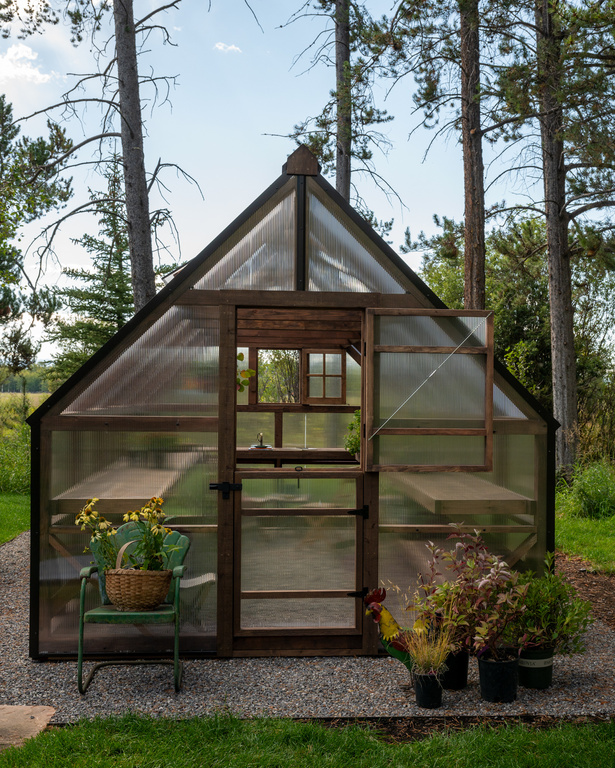
6 Ways to Cool Off Your Greenhouse

Are your tomatoes plants wilting?

Have your greens gone to seed?

Hot summer days call for drastic heat mitigation measures when it comes to greenhouse gardening. Lucky for us mountain dwellers, we only have to deal with the dog days of summer for a few weeks out of the year. The rest of the time, we praise our greenhouses for extending the season through both the early and late frosts.

As a high-altitude greenhouse gardener, you may have overlooked the need to cool things down due to extreme heat. But, when outdoor temperatures reach 80° F or above, indoor greenhouse temperatures can climb well over 100° F. This can cause even heat-tolerant veggies, like tomatoes and peppers, to drop their flowers or produce sterile pollen.

With a few simple measures, however, you can avoid this problem, as well as others like uneven ripening and sun-scalded fruit.

1- Location. Location. Location. Before you even start the growing process, choose a place for your greenhouse that already receives natural shade. Existing trees and shrubbery, your house, or an outbuilding can all act as a sunblock during the heat of the day. If your yard gets exposure to direct sun, you may want to situate your growing space in the northeast corner of your property, rather than the southwest.

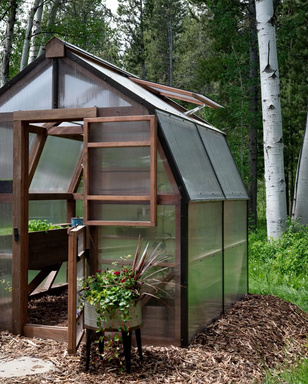
2- Remember, heat rises. Ceiling vents are one of the most efficient ways to cool your greenhouse down fast. Install crack vents that can be opened with a pole or heat-activated vents that open automatically when the mercury inside rises.

3- Enlist the help of shade cloth. Woven cotton or polyester shade blocks are highly effective at regulating greenhouse temperatures. With a looser fabric weave, you can deliver full-time sun at just the right amount to produce a fruitful harvest without overheating your plants. A tightly-woven cloth, however, can dampen your yield unless you situate it properly or raise and lower it throughout the day like a curtain.

4- Create flow-through venting. New gardeners should opt for a greenhouse that has a door on one end and either another door, a window, or a large vent on the opposite end. A flow-through breeze acts similarly to the wind activity your plants would experience outside in their regular habitat. Plus a slight rustle helps acts as a pollinator.

5- Turn on the fan. The hottest days are usually wind-free, and that’s when it’s time to break out the fans. Fans placed near doors on the floor can bring in cool air, while fans placed in the rafters can blow hot air out of ceiling vents. Just be sure to turn off your fans at night when the mountain temperatures plummet.

6- Damp it down. An ingenious, and sometimes overlooked, way to cool off your greenhouse is by raising the inside humidity. Now, that doesn’t mean overwatering. It simply involves the act of hosing down the structures inside your greenhouse. Hose off the walkway, the planter boxes, and other hard surfaces once in the morning and once at night.

Like with anything gardening, it takes diligence to keep extreme heat from hurting your cherished plants. But, with a keen greenhouse design and a few mid-summer habits, you can prevent Mother Nature’s wrath when she turns up the heat.

Add a comment...

Your email is never published or shared. Required fields are marked *

A Summer Harvest Picnic Menu

Finding connection during socially distant times—whether it’s to the earth, to family, or to friends—makes you feel whole. And while spending time in the garden can certainly fill your cup, celebrating the fruits of your labor is equally as rewarding.

This weekend, evoke connection by hosting a summer picnic with treasures from your garden or your local farmer’s market. The prep work is easy and with a full picnic basket you can jaunt off to your favorite mountain sanctuary for a family reprieve. Enjoy!

Harvest Picnic Menu:

Antipasto Plate

Crusty 460 Bread

New Potato and Bean Salad

Summer Berries and dark chocolate

A bottle of rosé wine (French or Italian)

Spindrift sparkling water

For the Antipasto Plate, arrange the following on a wooden cutting board:

1 round of sheep’s milk brie or chevre (we like Lark’s Meadow Farms’ Cloud Veil)

1 chunk of sharp white cheddar cheese

460 Bread baguette, sliced or torn

An assortment of cured meats

Olives (we like Jeff’s Natural Castelvetrano—available at Jackson Whole Grocer or Barrels and Bins)

Summer berries from your garden

French New Potato and Bean Salad

2 pounds         new potatoes, assorted colors

1  pound          green beans fresh from the vine

1 can               Great Northern beans, drained

2 tbls               fresh parsley, chopped

                        Salt and pepper to taste

For the dressing:

3 cloves           fresh garlic

2                      anchovy filets

2 teas.             Dijon mustard

4 tbls.              Red wine vinegar

1/3 cup            extra virgin olive oil

Instructions:

1. Slice each potato in half and place in a pot of salted water to cover. Bring to a boil for 20-30 minutes or until the potatoes can be easily pierced with a fork, yet still firm. Drain and cool.

2. Trim the ends of the green beans and place them in a steamer pot. Steam for 3-5 minutes until tender but firm. Remove from steamer and rinse with cold water in a colander.

3. Rinse and drain the Great Northern beans.

4. Combine garlic, anchovies, mustard, vinegar, and olive oil in a blender or food processor. Blend until smooth.

5. Combine all ingredients in a large bowl, toss with dressing, cover, and refrigerate until serving.

Don’t forget plates, cups, utensils, and a special someone or three. ❤️

Add a comment...

Your email is never published or shared. Required fields are marked *

The Ultimate COVID Project: A DIY Greenhouse

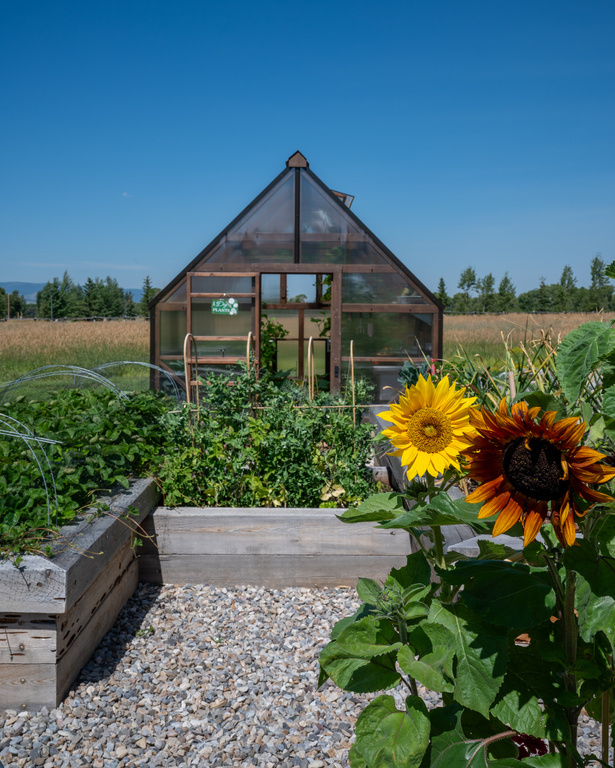
Let’s be honest.  Jenn and Nick Marlar’s COVID project makes us rethink our protocol of sitting around in our jammies eating cookies and cake during the stay-at-home order. Especially because, only months later, their family is already reaping the benefits of the DIY greenhouse they built on their property in Victor, Idaho.

“This project gave me something to occupy myself with during COVID,” says Jenn. Being immunocompromised, she admits she was a little anxious about the pandemic hype. “I wasn’t motivated to go up in my studio and make jewelry, but planting seeds kept me busy. I occupied my brain researching gardening tips and reaching out to my friends who already had greenhouses. I learned so much!”

Jenn’s vegetable growing hobby started eleven years ago in the yard of the couple’s starter house where their roof would deposit rainwater into her makeshift raised bed.

“It drove Nick crazy when the rain made a stream through the garden bed,” she explains.

So, at the first frost, he ripped it out and promised that someday he’d build her the best greenhouse ever. That dream came true this March when the family’s spring break trip to Mexico was canceled. Instead, they used the trip money to build a greenhouse on their own.

Nick, a perfectionist (according to Jenn), started drafting—and then re-drafting—plans for a 10- by 12-foot greenhouse. He studied several different GrowHuts models, as well as those of a Montana-based greenhouse builder, to come up with his plans. Next, he sourced 6- by 6-inch timber skids for the base and 4- by 4-inch timbers for the framing.

“I like to overbuild things—and it’s a little bit overbuilt,” explains Nick, noting that the timber skids would allow the structure to be mobile should he need to relocate it in the future.

Nick sourced the polycarbonate greenhouse siding from GrowHuts and waited patiently for it to arrive (shipping was delayed due to COVID). All the while, Jenn bought seeds from MD Nursery in Driggs and used the heated floors and a sunny window in her home to incubate and sprout them. Currently, the raised beds in their family’s greenhouse contain peppers, lettuce, zucchini, strawberries, squash, basil, and parsley, and five-gallon buckets on the floor hold four different strains of tomatoes.

“Right now we have a three-foot-long zucchini and it’s only June!” says Jenn.

All said and done, it took Nick about forty working hours to lay the foundation of crushed rock and pea gravel, build the base and the frame, and install the polycarbonate paneling. He’s still in the process of making tweaks and adding features like the four temperature-controlled venting windows (two on each gabled end and two in the roof) that he installed just this week. The nifty vents operate through a mercury expansion method that opens them when it’s hot and closes them automatically when the day cools off.

When asked what advice he’d give to another prospective greenhouse builder, Nick replies, “Don’t build your greenhouse in a totally exposed location. Some days, it’s a scorcher in there. Our greenhouse was registering over 100 degrees before I installed the roof vents.”

Instead, Nick recommends situating your greenhouse among trees that can act as shade blocks during certain times of the day or planting mature trees around the outside of your structure.

Jenn and the couples’ six-year-old daughter Aniston are already enjoying the first harvest from their garden beds. They go out every morning to sample the lettuce and pluck strawberries right from the vines.

“I think I’ll have way more veggies than our three-person family will be able to eat,” says Jenn. “My friends will be getting tons of greenhouse gifts this summer.”

That’s a big feat for someone who claims she wasn’t really an intrinsic gardener before her husband built this structure. But a little research and some extra spare time have proved fruitful for this family, as they’ll most definitely be harvesting produce right up until the holidays.

Interested in building your own greenhouse?

At GrowHuts, we’ll get you started by providing you with the materials you need and the advice of expert builders. Contact us for more information.

Add a comment...

Your email is never published or shared. Required fields are marked *

10 Ways to Pest-Proof Your Chicken Coop

Seasoned chicken farmers know the feeling of waking up to a ruckus in the chicken coop. Your heart drops as predators from either the air or the ground attempt to wipe out your flock. Add to that the threat of a mite infestation, and it’s a wonder people raise backyard chickens at all!

Here in the Tetons, we share our rural setting with weasels, owls, raccoons, and even bears. Still, protecting your hens from the predators of the night isn’t really a chore. All it takes is some thoughtful battening-down-of-the-hatches and a few weekly procedures to keep your flock safe and healthy year-round. Here’s how:

Get a rooster. Roosters get a bad rap, as not all roosters are aggressive. In fact, some make loveable pets while also serving their purpose in nature—protecting their flock. Roosters are your first defense against predators with an alarm that sounds at the initial sign of trouble. A good rooster will stand his ground, which sometimes proves fatal, but your flock of egg-producers will remain safely intact.

Bury your fencing. When fencing in your run, make a 4-inch trench, and then bury your chicken wire or fencing in it. A buried fence will deter foxes, coyotes, weasels, and even dogs from digging their way inside. This one upfront precautionary tactic can save you the stress of knowing your hens will rest easy inside their coop and run.

Add roof protection. A chicken run that is open on the top invites in birds of prey. And don’t be fooled by those who tell you that hanging CDs and other flashy objects will deter predatorial birds. Believe us; they won’t. Instead, build a roof on your run to prevent air attacks, or simply extend the wire fencing overhead to deter flying pests.

Lock ‘em up. While it’s tempting to leave your coop’s hatch door open all the time in the summer—to let in the breeze—this leaves hens vulnerable to ground predators who may find their way in. Make sure to close and lock all of the coop’s doors at night. Locking carabiners work best to deter smarty-pants creatures.

Limit scraps. Leftover kitchen scraps can be a huge attractant to mammals large and small. For this reason, many chicken farmers pair back the tasty treats in the summer when the animal population is active, and instead give them only in the winter when most mammals are hunkered down. Even still, scraps left on the coop of the floor, no matter the season, gives an open invitation to a meal.

Trim surrounding bushes. A coop surrounded by overhanging trees is a welcome site for sneaky pests, but a coop that’s out in the open gives predators no place to hide. Overgrown trees and bushes can also act as stairs for small mammals to access your girls from the roof. Keep it groomed, so no one will get in.

Free-range with a dog. A well-trained dog will protect her flock while they are ranging about your backyard in chicken heaven. While the chickens are foraging for worms, bugs, and grasses, a good ‘ole guard dog will have their backs and warn you of intruders.

Clean the coop. Some chicken farmers prefer the deep litter method of waste management for chickens. However, in the Tetons, composting takes a LONG TIME, so this isn’t our recommended go-to. Instead, we prefer to remove chicken waste from the coop weekly, with a big cleaning bi-monthly or quarterly. Lingering chicken poop invites in harmful bacteria, mold, and bugs.

Use natural products. Chemical cleaners and pesticides can compromise the immune system of your flock. Instead, opt for treatments made of essential oils and diatomaceous earth to keep bugs or mites at bay. We have successfully treated an unfortunate mite infestation with a mixture of water, peppermint oil, and lavender oil (for cleaning the coop) and diatomaceous earth spread throughout. While it takes slightly longer to rid mites with natural solutions (as opposed to chemical pesticides), you can continue eating eggs throughout the process because you’re not treating with harsh chemicals.

Don’t ignore decreased production. Broody hens go on a laying strike often. However, a non-laying chicken in her prime could also be showing signs of stress. Hens that sense danger by recurring predators or hens that have a mite or bug infection may stop laying altogether. Make sure to rule out signs of undue stress before chalking it up to a natural cycle.

Add a comment...

Your email is never published or shared. Required fields are marked *

Preparing Your Coop for Baby Chicks

Spring has sprung in the Tetons, and all the farm mamas are having their babies!

Backyard chicken farmers are ramping up, too, with new baby chicks—in all sorts of breeds—finding their way to their forever homes. For a backyard farmer, there’s nothing quite like the day the chicks arrive. Their little fluffy bodies, their awkward waddle, and their miniature peeps pull on your heartstrings from day one. These adorable babies will someday become great producers as they grow from chicks to pullets, and then eventually to laying hens.

Preparing your hens for their fruitful adulthood takes some preparation, some TLC, and—for the first time farmer—a great deal of time spent surfing best practices on the internet. We’re here help by lining you out on what you’ll need for the first few months of chicken rearing.

Setting Up the Brooder

Wouldn’t it be nice if you could just pick up your baby chicks and pop them into an outdoor coop?  Well, here in the mountains, this simply isn’t the case. The chilly spring temperatures in most North American locales prevent most chicken farmers from starting their chicks in an outdoor coop (or even in the garage, for that matter). Instead, you must set up a brooder to simulate the warmth of a mother hen.

Any large, sturdy container will suffice as a brooder box. Some people use large Rubbermaid bins, others construct their own from scrap lumber with a chicken wire top. We’ve found that one of the easiest housings to use is a large wire dog crate. Inside your brooder, you’ll need: 1.) Bedding or a floor lined with old towels, 2.) A heat lamp or another heat source, 3.) A chick feeder, and 4.) A chick waterer (available at most feed stores).

Set up your brooder in an area that maintains a steady temperature of 50° F or warmer. Safely hang the heat lamp from the wire crate making sure that it’s off to one side (so that chicks can escape the heat) and far away from anything that could start a fire. Secure it tightly. Try to maintain a temperature of 90 ° F in the brooder for the first week of life, and then decrease it 5° F each week. Purchase chick starter feed and electrolytes and probiotics from your feed store and place the food and water away from the heat source.

Hint: Instead of purchasing chicken electrolytes and probiotics, we like to make our own by dissolving 1 tablespoon apple cider vinegar with the mother, and 1 tablespoon raw honey into 1 quart of water. Store this in the fridge and fill the waterer, as needed.

Preparing the Coop

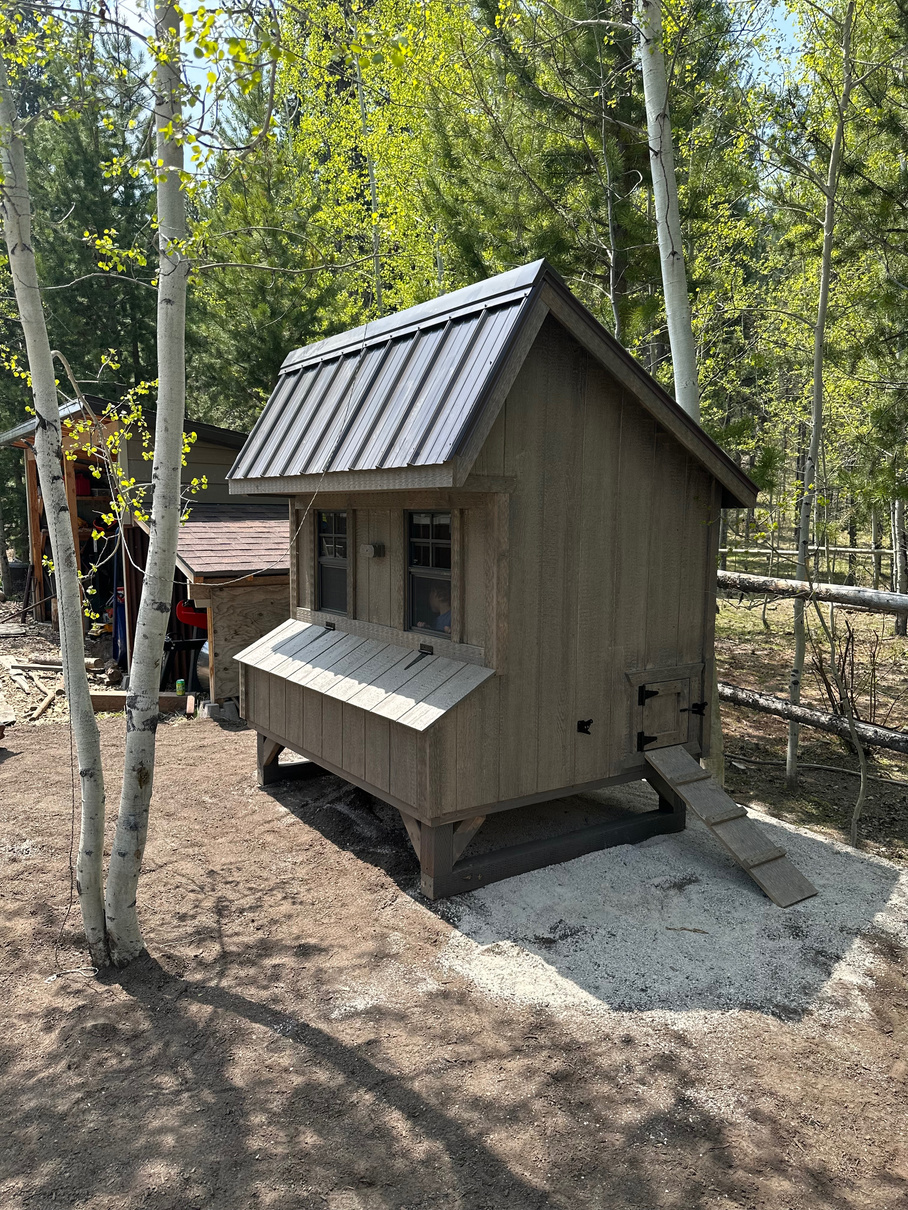
While the chicks are in the brooder, spend your time dialing in their coop. Our coops come equipped with proper ventilation (screened windows), a locking door (to predator-proof), a hatch door (to access their run), a roosting pole, and nesting boxes (for laying eggs).

You’ll need to outfit the coop with a full-size waterer and feeder which are available in both plastic and aluminum versions. If you are considering adding natural probiotics to your chickens’ water, like apple cider vinegar, choose a plastic waterer, as vinegar will corrode a metal one.

During the spring at high altitudes, you may need to provide supplemental heat until your chickens reach full size. You can use the heat lamp from your brooder for this purpose. Make sure to safely wire your lamp by running an electrical cord from the house to the coop, and then designing a sturdy bracket from which to hang the light. Heat lamps are a major cause of coop fires, so securing it safely, and with a backup, is recommended.

Lastly, purchase pine shavings to fill your nesting boxes, then sprinkle 1 to 2 inches on the floor. This gives your chickens something to scratch at and also adds in the cleaning process, helping to decompose the chicken waste. Once dirty, scoop out the old shavings and freshen them up.

Constructing the Run

Constructing a chicken run is one of the most time-consuming setup projects. Still, a sturdy and predator-proof run will protect your chickens for years. In some areas of the country, chicken farmers can get away with roofless runs. But not in the Tetons! Here, we need a fenced run, complete with a roof, to protect the chickens from both ground mammals and birds of prey.

You can make your chicken run from galvanized metal fencing and notched metal fence posts (available at most hardware stores). If you’re crafty, you can also build a run out of wood framing and chicken wire. Whatever you choose, make sure that your run is fastened securely to your coop and preferably dug into the ground. We suggest burying 4 to 6 inches of wire fencing so that predators cannot dig underneath it.

Moving Your Pullets

It’s a good idea to introduce your chicks to the outdoors by placing them in the run when they are big enough and have grown their feathers. Choose a sunny day to move them outside and make sure to supervise them as they forage and play. Do this a few times prior to making the big move.

In about 6 weeks (depending on the weather), your pullets will be ready to move into their mountain coop. If the temperatures are still cold at night, supplement the heat for a few more weeks. Around eight weeks of age, you will also want to change your chicks from a starter feed to a grower feed. Then, in about 18 weeks, your first egg will arrive and you’ll switch them, once again, to their final grower feed.

Enjoy your bounty of fresh eggs!

Add a comment...

Your email is never published or shared. Required fields are marked *

growhutsbiz@gmail.com | 208.787.2239